Working with Python Packages and Conda Environments
Learning Goals
After completing this lesson you will be able to
- explain what a Python package is.
- import a package into Python.
- understand how dependency management can play a large role in Python programming.
- explain how to use conda environments to manage your third-party libraries.
- create a conda environment.
- install a Python package in the terminal using conda.
Background
You have probably noticed that most of our notebooks start with importing Python packages like pandas, which we then use for our data analysis (see the code below).
import glob
import pandas as pd
import matplotlib.pyplot as plt
You may ask yourself, exactly what a package is and why we should care about this?
Also in the coming weeks, we will be using additional more specialized packages to work with environmental data. These packages do not come from a single source, they are third party libraries
Third party libraries are critical to making Python the great tool it is. Developers and scientists all over the world are constantly improving and adding to the functionality Python provides by writing new packages. When you require one of these third party libraries in your workflow, they are called dependencies because your workflow depends on them to function.
(CU Boulder, 2020)
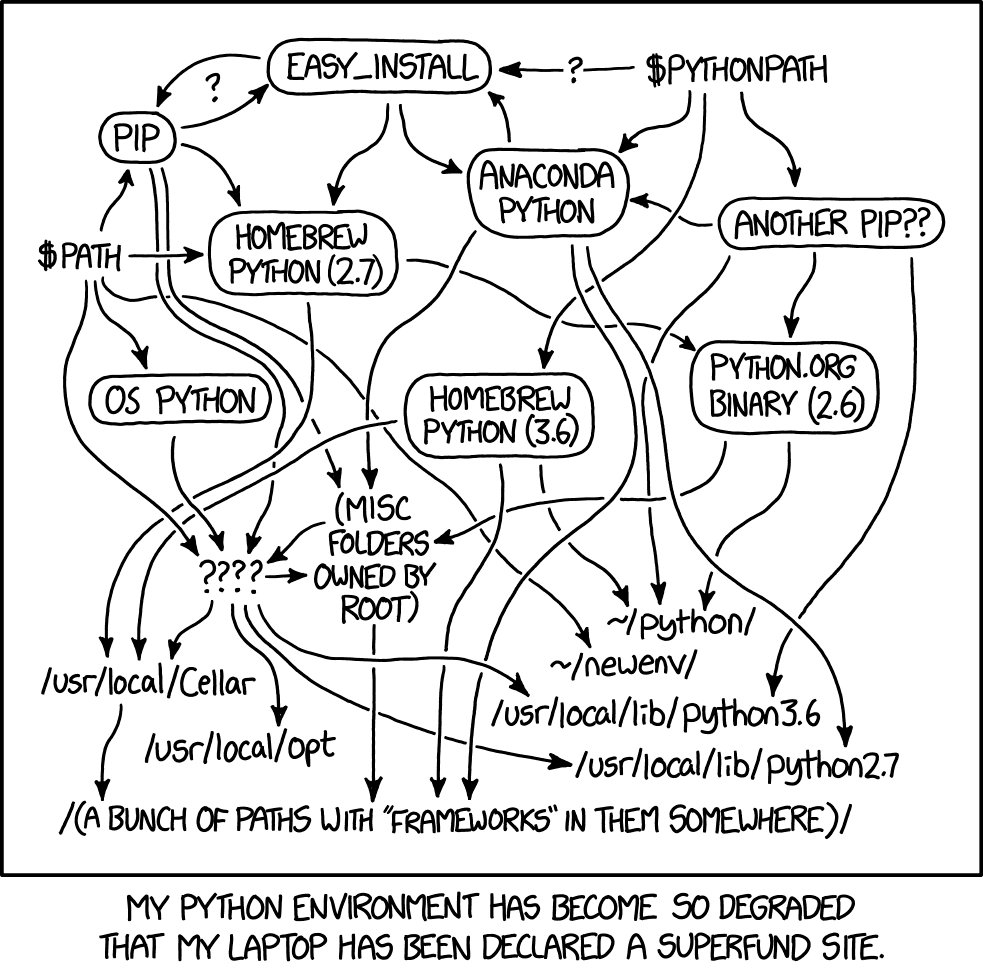
This means we need to find ways to manage these dependencies. The answer to this is using computation environments which are documented and reproducible, like all of our workflows
Packages
What are packages
In Python, a package is a bundle of pre-built functionality that adds to the functionality available in base Python. Base Python can do many things such as perform math and other operations. However, Python packages can significantly extend this functionality.
You can think of a Python package as a toolbox filled with tools. The tools in the toolbox can be used to do things that you would have to otherwise hand code in base Python. These tasks are things that many people might want to do in Python, thus warranting the creation of a package. After all, it doesn’t make sense for everyone to hand-code everything!
For example, the matplotlib package allows you to create plots of data. Since most of us create plots routinely, having a Python package to create plots makes programming more efficient for everyone who needs to create plots.
(CU Boulder, 2020)
Python’s scientific ecosystem
Fabien Maussion provides a great description of the most important Python packages for scientific research.
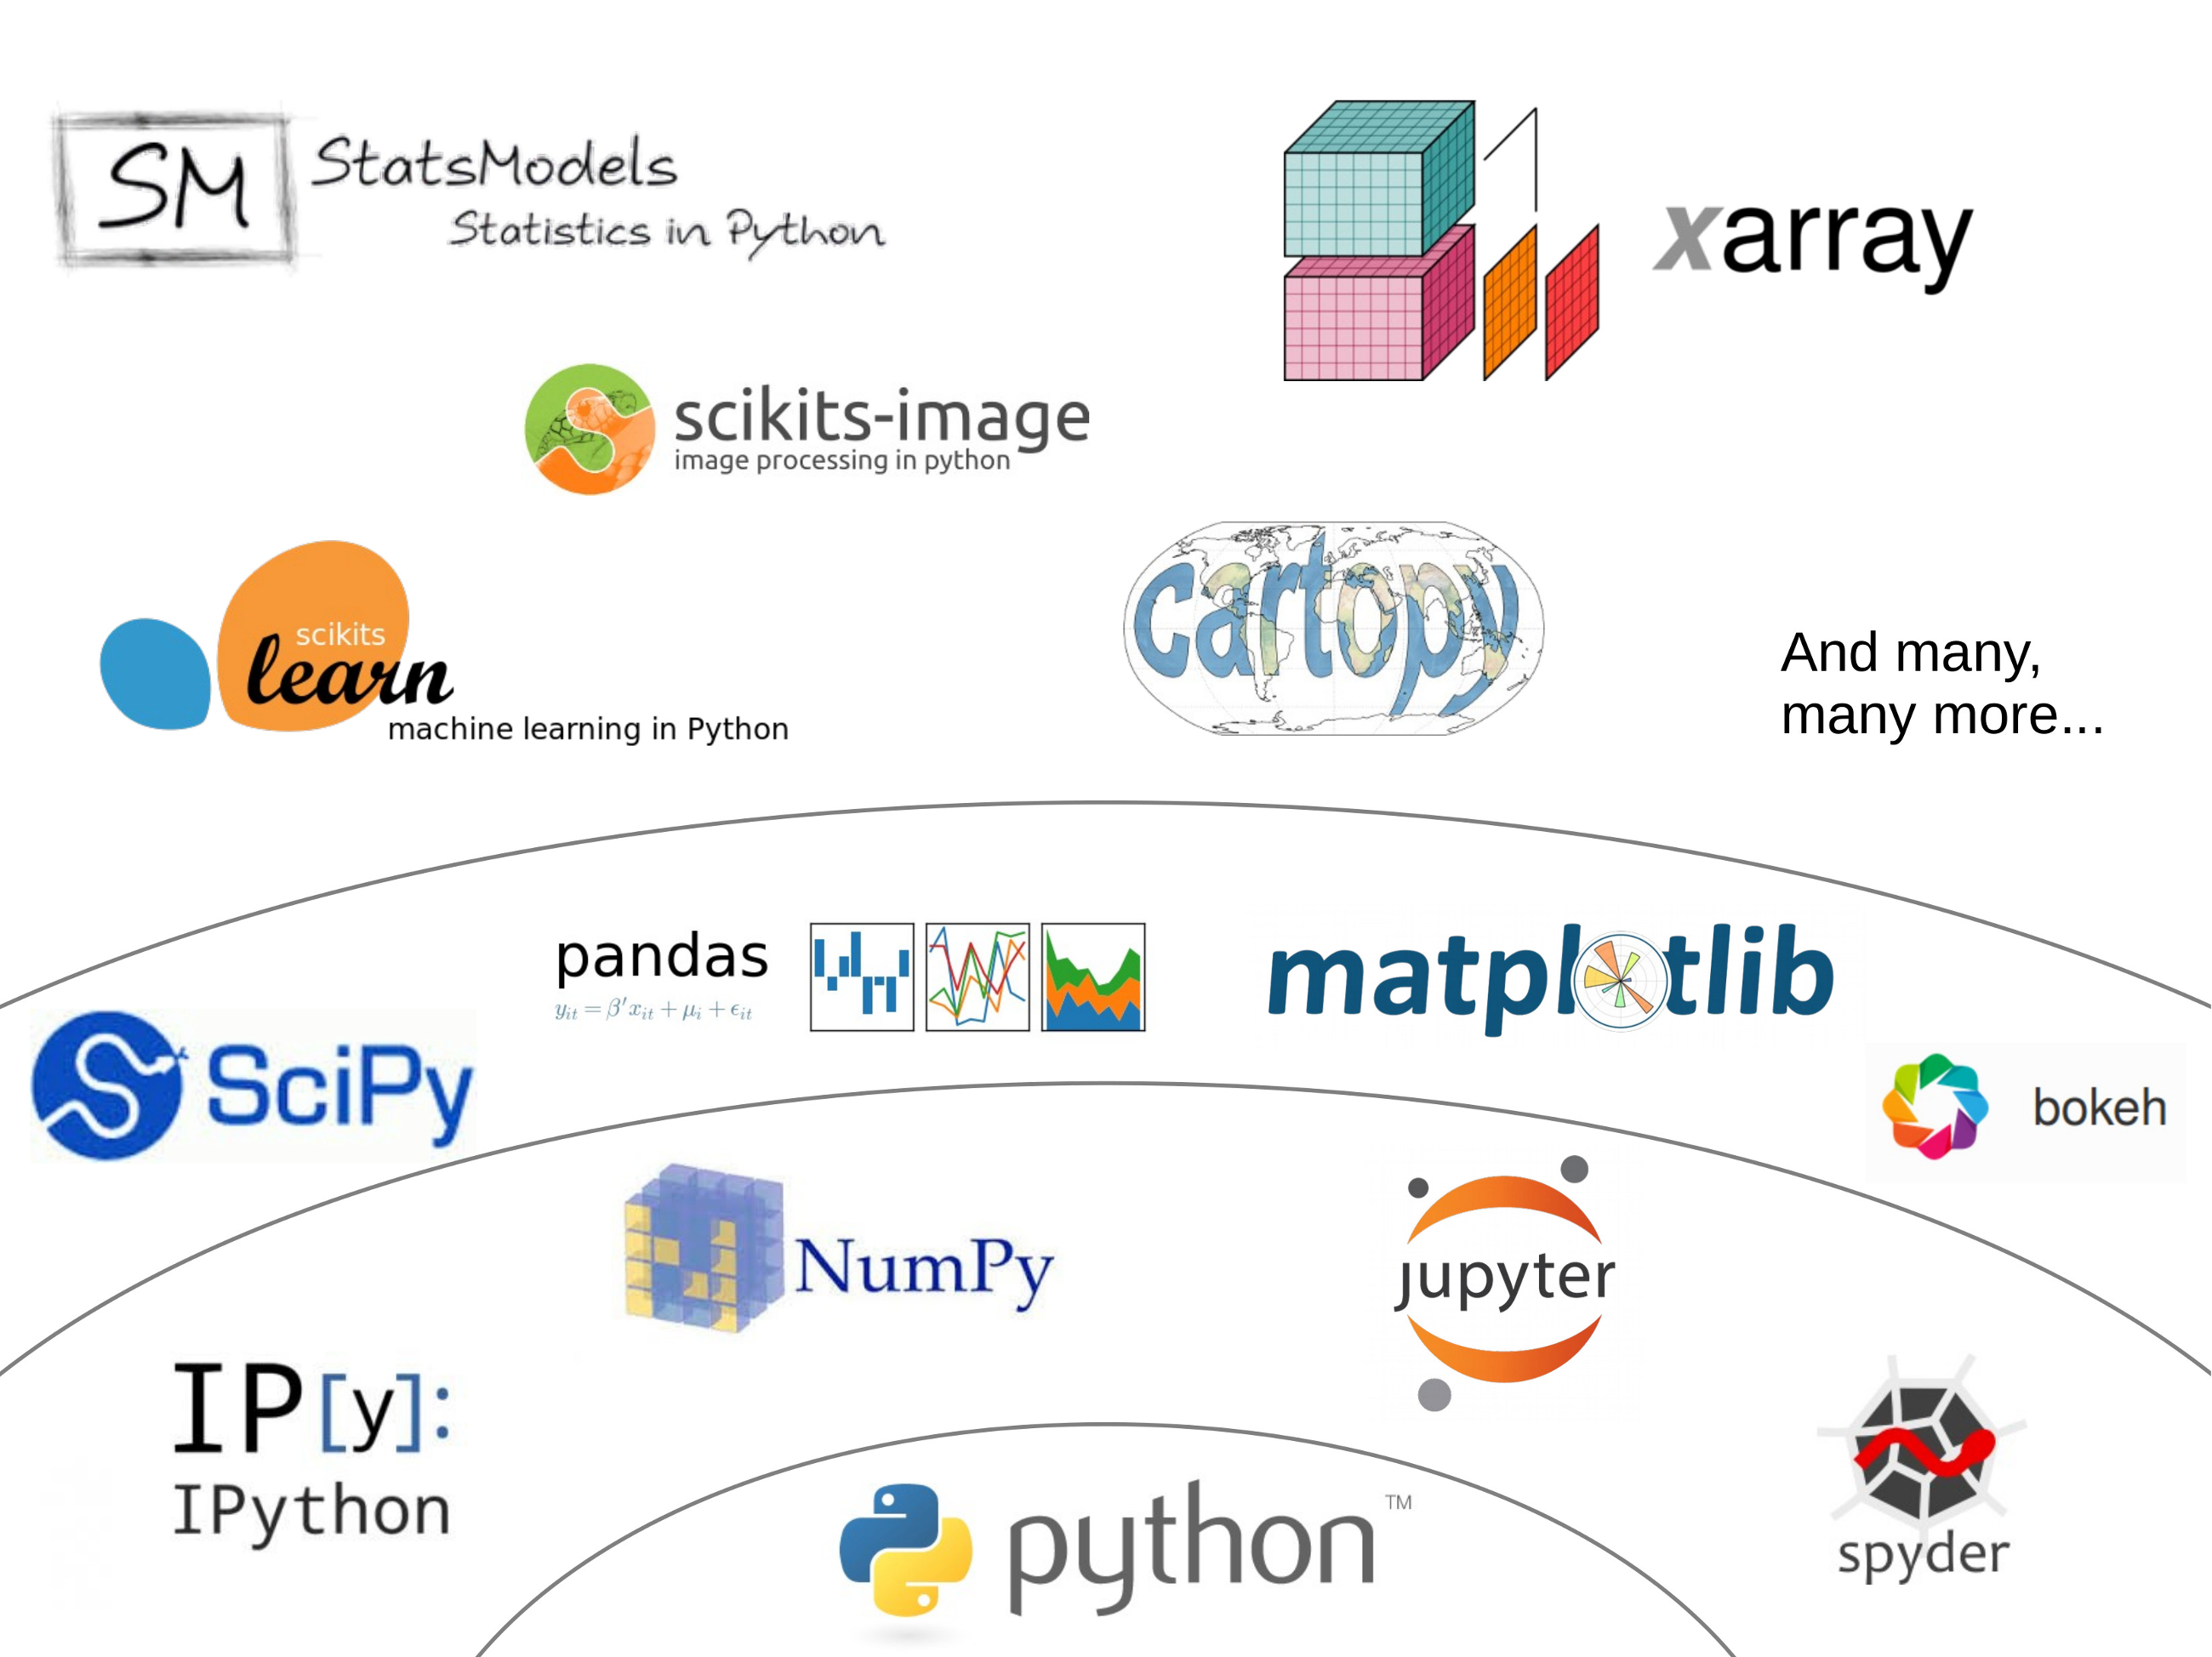
We have already used some of them, like Jupyter, matplotlib, and pandas. Others like xarray will be introduced soon.
Working with packages
You have to explicitly load (i.e. import) all packages that you want to use in your code.
This is done using the import command (see below).
import glob
import pandas as pd
import matplotlib.pyplot as plt
Python packages can have modules. For example, the matplotlib library has a module called pyplot, which makes it easier to set up plots.
We can import specific modules from a package by first calling the package name followed by the module name (see above).
We can also import the module using an alias or short name, such as plt for matplotlib.pyplot.
import matplotlib.pyplot as plt Using an alias helps us avoid typing long package names, whenever we use functionality.
For example, you could read a .csv file with pandas like this:
import pandas
pandas.read_csv('filename')
or to make our life easier going forward by using pd as a shorthand:
import pandas as pd
pd.read_csv('filename')
Python Environments
We installed Anaconda Python because it provides a fairly comprehensive out-of-the-box collection of Python packages for data analysis and data science. So, whenever you run Python code that relies on for example pandas this package is already installed and ready to import.
However, we will be starting to use some Python packages, like xarray soon, which are not installed in the default installation.
This means it is now a good time to introduce you to Python virtual environments.
What is an environment and why do I want one?
A Python environment is a dedicated directory where specific dependencies can be stored and maintained. Environments have unique names and can be activated when you need them, allowing you to have ultimate control over the libraries that are installed at any given time.
You can create as many environments as you want. Because each one is independent, they will not interact or “mess up” the other. Thus, it is common for programmers to create new environments for each project that they work on.
(CU Boulder, 2020)
We are using Anaconda as our Python distribution, which is built around the conda package manager. Several features make conda a good choice for letting it manage your Python installation and package management:
- Conda is cross-platform and available on Linux, Mac, and Windows
- When installing new packages, conda will perform a dependency check and will try to find a combination of packages that play nice with each other.
- It has the built-in functionality for managing different Python environments.
Managing Python Environments
Because of dependency issues, it is a good idea to create a dedicated environment for each project that you undertake (e.g. your semester project).
This means you need to be able to:
- create a new environment
- add packages to the environment
- activate the environment for use
Using the Anaconda Navigator
You can use the Anaconda Navigator to do this. The online documentation walks you through the steps on how to do this.
In this course, you will be provided with a configuration file, that describes the environment. A common file type for this is YAML .yml a human-readable file format commonly used for configuration files. If you open an environment configuration file in .yml-format, it will contain a list of all the installed python packages with the specific versions. This information is then used to re-create (i.e. import) the environment for you like in Figure 1:

To use the environment, you select if from the list like in Figure 2:

Using the command line
I personally avoid using the Anaconda Navigator, because it is sooo slooow!

If you open the Anaconda Prompt (or Anaconda Powershell Prompt) in Windows or the Mac Terminal you can do all of this with a few lines of code.
Create an environment:
To create a new environment we can use the below command. We can chose any name we want as the name of the environment (
<environment name>).$ conda create -n <environment name>Use an existing environment:
you can list all available environments like this:
$ conda env listyou can then select an environment from the list like this:
$ conda activate <environment name>You should now see the environment name in front of the command prompt showing you which environment is currently active.
Once you have activated a conda environment, all installations that you run will be installed specifically to this environment. This allow you to have ultimate control when installing and managing dependencies for each project.
(CU Boulder, 2020)
Install a package into an environment:
We first need to activate the environment and can then install the packages that we want by providing their name (
<package name to install>).$ conda activate <environment name> (<environment_name>)$ conda install <package name to install>Import an environment using
yml-fileNavigate to the directory that contains the
yml-file and enter the below:$ conda env create -f environment.ymlUpdate an environment with a new
yml-file:Once you have created an environment you can always update it with a
yml-file. For example, the below code will update th ISAT420 environment with the packages found in theenvironment.ymlconfiguration file. Again, this assumes that you are currently in the directory containing theyml-file$ conda activate ISAT420 $ conda env update -f environment.yml
Acknowledgements
This lecture is partially based on:
- CU Boulder: Intermediate Earth Data Science Textbook, Chapter 11 - Python Packages, 2020
- Fabien Maussion: Scientific Programming Course - Week 5: Scientific Python